Configuring OIDC Security Profiles
The OIDC provider must have previously been configured (see OIDC Provider Requirements), and the TD administrator must have the following information from the customer's OIDC provider to start the configuration process.
-
The issuer URL of the OIDC provider. (See Section 2 of the OpenID Connect 1.0 specification and your OpenID provider documentation.)
-
The
Client Idthat is generated by the authorization provider when a client application is created by your OIDC system administrator.Note: Some providers allowClient Idvalues to be user-generated. -
The
Client Secret, which is also generated by the provider when the client application is created. -
Any custom scopes required by the OIDC provider.
- Go to, or create, a Titania Delivery Organization to add a new authentication system.
- Click Authentication Systems.
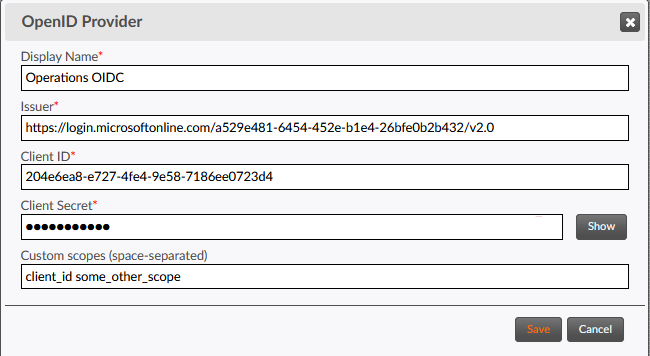
- In the Portal Authentication Systems page, click New in the OpenID
Providers section.The OpenID Provider window will appear.
- In the Display Name field, enter a label for the OpenID provider. This label should be unique among all OpenID profiles on your TD platform, to avoid ambiguity when selecting a security profile for a portal.
- In the Issuer field, enter the issuer URL of your OIDC provider application.
- In the Client ID field, enter the
Client Idcreated or generated when the client application was created by your OpenID system administrator. - In the Client Secret field, enter
the
Client Secretgenerated when the client application was created by your OpenID system administrator. - If your OIDC provider requires custom scopes to process an authorization request, enter them in the Custom scopes field, separated by spaces. Otherwise, leave this field blank. If present, custom scopes will be appended to the default scopes used for the OIDC protocol.
- Click the Save button.
Note: If the configuration
information needs to change, the Save button will update the existing
OpenID configuration.
