Chapter 1: Overview
This document provides details about how to install Titania Web Reviewer . It also includes information about all software dependencies.
This document provides details about how to install Titania Web Reviewer . It also includes information about all software dependencies.
The following tasks must be completed prior to installing Titania Web Reviewer .
Note: It is recommended to follow infrastructure and security best practices when installing IIS, as detailed at https://techcommunity.microsoft.com/t5/core-infrastructure-and-security/iis-best-practices/ba-p/1241577#:~:text=%20IIS%20Best%20Practices%20%201%20Application%20pool,than%20the%20one%20you%20keep%20your...%20More%20
Note: It is highly recommended to implement the Transport Layer Security (TLS) best practices with the .NET Framework to address weak SSLciphers, as detailed at https://docs.microsoft.com/en-us/dotnet/framework/network-programming/tls
Note: It is highly recommended to implement the Content Security Policy (CSP) best practices to prevent cross-frame scripting, as detailed at https://docs.microsoft.com/en-us/microsoft-edge/extensions-chromium/store-policies/csp
Note: It is highly recommended to implement Microsoft Security Advisory 3009008 to prevent weak SSL protocols, as detailed at https://docs.microsoft.com/en-us/security-updates/SecurityAdvisories/2015/3009008
Note: It is highly recommended to implement Request Filtering <requestFiltering> best practices to prevent HTTP method overrides, as detailed at https://docs.microsoft.com/en-us/iis/configuration/system.webserver/security/requestfiltering/
Install Internet Information Services (IIS) Manager with the following features:
Commons HTTP Features/Default Document
Commons HTTP Features/Directory Browsing
Commons HTTP Features/HTTP Errors
Commons HTTP Features/Static Content
Heath and Diagnostics/HTTP Logging
Performance/Static Content Compression
Security/Request Filtering
Obtain and install a security certificate within IIS Manager. This will typically need to be performed by corporate IT.
Note: Using a security certification is required to use the application.
Download and install the version of ASP.NET Core Runtime - Windows Hosting Bundle corresponding to your environment and the Software Compatibility Matrix.
The Titania License Manager service must be installed and licensed. Refer to the Titania License Manager Installation Guide for instructions. Additionally, a license will need to be obtained from the vendor. The vendor will need the Device Name of the Titania License Manager installation server.
Attention: This prerequisite only needs to be performed if Titania Web Reviewer was installed.
Titania Web Reviewer requires a separate database to store annotations. Ensure the database is installed prior to installing Titania Web Reviewer . The database installation must be obtained from the database vendor. Refer to the Titania Web Collaboration Suite Software Matrix for supported databases.
After installing the database, the schema corresponding to the database will need to be installed. Please refer to section Configuring the Annotations Database.
Note: It is recommended to follow the vendor’s security best practices when installing the database. Please refer to the recommendations for your specific database.
This sections details how to install and configure Titania Web Reviewer . Titania Web Reviewer is built upon Titania Web Editor so parts of Titania Web Editor also need to be configured during this installation. The files required to perform this installation are located in the following distributions where XXX is the release number.
                                 Titania
                                 WebEditorReviewer_vXXX.zip
(for Web Editor with Reviewer
installations)
                                 Titania
                                 WebReviewer_vXXX.zip
(for Web Reviewer-Only installations)
TitaniaPositionRecovery_vXXX.zip
Note: The Titania Web Editor service is required for both Web Editor with Reviewer and Web Reviewer Only installations.
C:\Titania
                                 \WebEditor
or C:\Titania
\WebReviewer.
Titania WebEditorin the Site name field.
Titania
WebEditor folder in the Physical path field from Step
1.
https.
TitaniaPositionRecovery_vXXX.zip distribution to a folder on the IIS server. For example, C:\Titania\PostionRecovery.
TitaniaPositionRecoveryin the Site name field.
https.
Note: Authentication is not required by this service. If necessary, IIS can be configured to authenticate this service by restricting IP addresses that can access the service. The steps to configure IIS to restrict IP addresses are outside the scope of this guide.
This section provides steps for installing a new instance of the Titania Web Editor and Titania Web Reviewer .
All configurations
are located within the wwwroot folder either
in the custom or default folder. The default folder contains all out
of the box configuration and templates. The files in the default folder should NEVER be modified. Rather they
should be copied into the custom folder. Make
sure to copy the folder structure in addition to the configuration
file into the custom folder. The system will
first look in the custom folder then the default folder. Future releases will only ever includes
updated files in the default folder. The custom folder will never be released.
Locate the windchill folder within the
distribution.
Copy the contents of tasks folder to the
existing Windchill installation tasks folder.
Note: The wtSafeArea folder does not need to be
copied at this time.
Note: This is section is not applicable for Titania Web Reviewer -only installations.
default folder. . Instead, copy the file and folder
tree into the custom folder.Templates are used to create new XML documents within Web Editor. Templates can be located either in Windchill or on the Web Editor application server.
Storing Templates on the Web Editor application server
This method is best if users can specify the Windchill URL when connecting to Titania Web Editor . Using this method, all templates are stored in a common location for all Windchill instances.
Locate the templates folder within the
web application folder.
Place each template in the templates with
a .template file extension. Templates can be
organized into subfolders.
Storing Templates in Windchill
This method is
best if Titania Web Editor
is configured
to a single Windchill server using the WindchillServerURL option. Refer to Web Editor Configuration. If this
option is not utilized, all Windchill instances accessed by Titania Web Editor
must have the templates
located within each Windchill instance at the same location. In this
case, it may be better to locate the templates in a common folder
on the Web Editor application server.
Create a Web Editor templates folder within Windchill. The location must be read-only to all Web Editor users. Best practice is to create a folder in the same container as the Arbortext Editor burst rules.
Set the to the CMSTemplatesFolder
Titania Web Editor
configuration option
to the folder path. Refer to the CMSTemplatesFolder option in Web Editor Configuration.
Use Arbortext Editor to load each template into the templates
folder using File | Save As Object menu option.
Templates can be organized into subfolders. Alternately to saving
each template individually, templates can be bulk loaded using the
Arbortext Editor command-line function save_as_windchill_template_source(). Please refer to the How to Bulk Load Templates section in the Appendix.
Windchill object
types and attributes corresponding to the XML are defined in windchillConnector.xml and must be configured to match
your Windchill implementation. If this is a new installation, find
the windchillConnector.xml-template and rename
to windchillConnector.xml.
default folder. . Instead, copy the file and folder tree into the custom folder.| Element/Attribute | Definition |
WindchillServerURL
|
Optional. This is the URL of the Windchill instance.
For example, |
RootFolderPath
|
Not applicable for Titania Web Reviewer -only installations. Optional. If set, users will be restricted to only access or create objects within this folder. If not specified, users can navigate the entire Windchill repository based on their permissions. |
EnablePublicationStructureAuthoring
|
Not applicable for Titania Web Reviewer -only installations. Optional. Enabling publication structure authoring will add a Publication Structures folder within the container enable authors to navigate all publication structures within the container. Publication Structure elements within normal folder browsing will also be visible. It will also enable authors to author an entire publication structure at a time. Valid values are "true" or "false". Default is “false” if value is not provided. |
EnableInformationStructureAuthoring
|
Not applicable for Titania Web Reviewer -only installations. Optional. Enabling information structure authoring will add a Information Structures folder within the container enable authors to navigate all publication structures within the container. Information Structure elements within normal folder browsing will also be visible. It will also enable authors to author an entire information structure at a time. Valid values are "true" or "false". Default is “false” if value is not provided. |
PublicationStructureResourceSectionName
|
Optional: The name of the section located within a publication structure that contains resource files. Resource files include the keybase files required to resolve key references to a keydef. If defined, the section and files contained will not be visible when viewing publication structures. |
ContentMetadataAttributes
|
Optional. List of Windchill attributes that will
be sent to the Web Editor with the content. These could be used by
the UI for display or additional functionality. These attributes will
also be attached to Titania Web Reviewer
annotations and stored in the Annotations database. No value
will be included if the attribute does not exist on the Windchill
soft-type. The format is internal attribute names separated by comma's.
The default is If the number attribute is specified, it will be displayed in the document header within the application for easy reference. |
AutoReviseStates
|
Optional. List of Windchill internal state names that, when checked out, the system will automatically revise the object. The transition from these states to starting state must be valid within the Windchill lifecycle. |
DynamicDocumentObjectType
|
Required. Set to the full path of the dynamic document
object type. For example: |
ObjectTypeMapping
|
Not applicable for Titania Web Reviewer -only installations.
Required. This tag is a child of
If not set, all objects will be mapped to the object type
defined by |
MetadataMapping
|
Not applicable for Titania Web Reviewer -only installations.
Required This tag is a child of
|
Editor Configurations
are defined in editorConfig.xml. If this is a
new installation, find the editorConfig.xml-template and rename to editorConfig.xml.
default folder. . Instead, copy the file and folder tree into the custom folder.| Element/Attributes | Description |
SpellCheckerServerURL
|
Required. The URL of the Titania Spell Checker service as configured in IIS, Note: For Titania Web Reviewer
-only installations,
set the URL to |
LMServerURL
|
Required. The URL of the Titania License Manager service. |
CMSTemplatesFolder
|
Not applicable for Titania Web Reviewer -only installations.
Optional. The full path into the CMS where the templates
are stored. All Web Editor users must have permissions to read and
download objects from this folder. The folder path must be the same
as displayed in the Web Editor browser. If the |
ListDefinitions/ListDefinition
|
Not applicable for Titania Web Reviewer -only installations.
Optional. This defines the list of valid values that can
be assigned to XML attributes. Value lists can be either stored on
the Web Application server or acquired from Windchill Global Enumerations.
The The When located on the Web Application server, lists are located
in the Web Application When located
in a Windchill Enumerated list, the |
This installation guide provides steps for installing a new instance of Titania Web Reviewer .
All configurations
are located within the wwwroot folder either
in the custom or default folder. The default folder contains all out
of the box configuration and templates. The files in the default folder should NEVER be modified. Rather they
should be copied into the custom folder. Make
sure to copy the folder structure in addition to the configuration
file into the custom folder. The system will
first look in the custom folder then the default folder. Future releases will only ever includes
updated files in the default folder. The custom folder will never be released.
The Web Application environment configurations are made using the Titania Position Recovery Service web site application Configuration Editor feature. Each of the below environment variables must be set.
default folder. . Instead, copy the file and folder
tree into the custom folder.| Section | Argument | Name | Comment |
|---|---|---|---|
|
system.webServer.aspnetCore |
environmentVariables |
CMS__APIBASEURL |
Set to the Web Editor API in the form https://<server>:<port>/api/editor/ replacing server and port with what was configured for the Titania Web Editor
Note: Make sure to
end the URL with a forward slash.
|
|
SchemaExperience__BlockTest |
Set to the value specified below by*. | ||
|
SchemaExperience__ObjectTest |
Set to the value specified below by **. |
*
self::alt or self::cmd or self::codeblock
                              or self::consequence or self::ddhd or self::dt or self::dthd or self::equation-block
                              or self::glossAbbreviation or self::glossAcronym or self::glossdef
                              or self::glossShortForm or self::glossSynonym or self::glossterm or
                              self::howtoavoid or self::lcAge or self::lcAssessment or self::lcAttitude
                              or self::lcBackground or self::lcDelivery or self::lcEdLevel or self::lcGapItemDelta
                              or self::lcGeneralDescription or self::lcGoals or self::lcInteractionLabel2
                              or self::lcJtaItem or self::lcKnowledge or self::lcLearnStrat or self::lcMotivation
                              or self::lcNeeds or self::lcObjective or self::lcObjectivesStem or
                              self::lcOrgConstraints or self::lcPlanObjective or self::lcPlanResources
                              or self::lcProcesses or self::lcSkills or self::lcSpecChars or self::lcTaskItem
                              or self::lcTime or self::lcValues or self::lcWorkEnvDescription or
                              self::lines or self::linktext or self::navtitle or self::p or self::pre
                              or self::proptype or self::propvalue or self::pt or self::screen or
                              self::searchtitle or self::shortdesc or self::sli or self::title or
                              self::typeofhazard or self::indexterm
**
self::img or self::hazardsymbol or self::mathml
The following file(s) need to be updated specific to the distribution.
Locate the database schema in the schema folder in the distribution corresponding to the previously installed
database.
Install the schema within the database using one of the following recommended database management tools corresponding to the installed database. Each of these can be downloaded from the vendors website.
Oracle SQL Developer
Microsoft Sql Server Management Studio
It is recommended that a dedicated user be configured specifically for Titania Web Reviewer .
Reviewer Configuration
Reviewer Configurations are defined in reviewConnector.xml. If this is a new installation, find the reviewConnector.xml-template and rename to reviewConnector.xml.
default folder. . Instead, copy the file and folder tree into the custom folder.| Element/Attributes | Description |
ReviewAppServerURL
|
Required. The URL of the Titania Position Recovery Service as configured in IIS. For example: https://<servername>:8083 |
Database
|
Required. |
DatabaseConnectionString
|
Required. Annotations database connection string excluding username and password. |
DatabaseConnectionUsername
|
Required. Annotations database connection string
username. The |
DatabaseConnectionPassword
|
Required. Annotations Database connection string
password. The |
https://<server>:<port>/webreviewer?docNbr=<document_number> where server and port are
those configured for the Titania Web Editor
application and document_number is a valid
Windchill Dynamic Document Object Number. A valid URL will prompt
you to log in similar to that of Web Editor:/api/health”. For example https://<servername>:8082/api/health. If successfully configured, the URL will return a JSON file containing
service information.
document_number parameter is displayed. If more than one document corresponds to
the document_number parameter, it will display
the first one of the dynamic document type specified in the Windchill
configuration.This section details how to install optional components.
Installing the Open in Titania Web Editor
and Open in Titania Web Reviewer
features are
optional. To install them, follow the procedure below.
Extract the wtSafeAreas file into the <Windchill>/wtSafeArea folder on the Windchill server.
There are two folders inside of this folder that should align with
the folder structure you see inside the wtSafeArea.
Navigate to wtSafeArea/siteMode/codebase/titania.properties and update the URLs corresponding to your implementation ensuring
that ?docNbr= remains at the end of the URL.
Open a Windchill Shell as Administrator and run the following command to deploy the files.
ant -f bin/swmaint.xml installSiteChanges
Restart Windchill and verify the new Open in Titania Web Editor and/or Open in Titania Web Reviewer menu items are visible in the for Dynamic Documents, Information Structures and Publication Structures.
Installation of the Share menu is optional. To install, follow the procedure below.
Locate the Arbortext Editor Application distributable and copy
the com.titania.web folder to a new application that is accessible by Arbortext Editor users.
If an Arbortext Editor application is already being used, then
copy com.titania.web into the existing application folder.
Note: Do not install the application into the Arbortext Editor Program Files folder. Instead, create a new folder either on the local drive or a common file share.
If not already set on the local users PC, modify the APTAPPLICATION environment variable with the application
path from Step 1.
Note: If the APTAPPLICATION environment variable does not already exist, follow the steps below to create it:
On the local users PC, navigate to the Environment Variables.
Select New to add a new environment variable.
In the Variable name: field, type APTAPPLICATION
In the Variable value: field, type the folder path that points directly to the location of the application folder.
Note: Be sure ;%D is added to the path.
Click OK to apply the changes.
Locate the configuration file config.xml file in the com.titania.web/config folder
webeditorbaseurl and webreviewbaseurl to point to the Titania Web Editor
and/or Titania Web Reviewer
application
servers.
webeditorbaseurl is only required
if Titania Web Editor
is installed.
The webreviewbaseurl is only required if Titania Web Reviewer
is installed.Start Arbortext Editor and open an XML document from Windchill.
Verify the new Share file menu is visible with the submenus visible corresponding to your installation.
This section details how to configure various aspects of Titania Web Reviewer user interface.
Outline Badge configurations defines the statuses that appear in
the Outline panel. This configuration applies to both Web Editor and
Web Reviewer. The configuration file is called outlineNodeStatuses.json is located in the uiconfigs folder.
{
	"nodeStatuses": [
		{
			"internalName": "INWORK",
			"label": "In Work",
			"icon": "file-lines",
			"condensedLabel": "IW",
			"backgroundColor": "state-message-icon-info-color",
			"clickOperation": "scroll-node-into-view",
			"tooltipContent": "This document is in work."
		},
		{
			"internalName": "RELEASED",
			"label": "Released",
			"icon": "file-check",
			"condensedLabel": "R",
			"backgroundColor": "state-message-icon-success-color",
			"clickOperation": "scroll-node-into-view",
			"tooltipContent": "This document is released."
		},
		{
			"internalName": "revised",
			"label": "Revised",
			"icon": "rectangle-history",
			"condensedLabel": "RV",
			"backgroundColor": "state-message-icon-muted-color",
			"clickOperation": "scroll-node-into-view",
			"tooltipContent": "This document has been revised."
		},
		{
			"internalName": "new",
			"label": "New",
			"icon": "file",
			"condensedLabel": "N",
			"backgroundColor": "state-message-icon-muted-color",
			"clickOperation": "scroll-node-into-view",
			"tooltipContent": "This document is new."
		},
		{
			"internalName": "reused",
			"label": "Reused",
			"icon": "arrows-to-circle",
			"condensedLabel": "RE",
			"backgroundColor": "state-message-icon-muted-color",
			"clickOperation": "scroll-node-into-view",
			"tooltipContent": "This document has been reused."
		}
	]
}
“internalName” should match the lifecycle state as it appears in the content management system (internal name, not display name). ”. The “new”, “revised”, and “reused” nodeStatuses must remain. The lifecycle specific nodeStatuses can be changed. The “new” status indicates that the object has yet to be released. The “revised” status indicates that a previously released object has been revised for updates. The “reused” status indicates that the object is reused in multiple publications.
“label” is the English description of the lifecycle state.
“icon” is the name of an applicable FontAwesome icon (https://fontawesome.com/icons).
“condensedLabel” is 1 character that displays if there is no “icon” defined. The “icon” should be omitted to use this or the “condensedLabel” should appear before the “icon” to utilize it.
“backgroundColor” is defined with one of the following, which designates the color of the icon and the popup text:
state-message-icon-error-color (red)
state-message-icon-info-color (blue)
state-message-icon-muted-color (dark grey)
state-message-icon-success-color (green)
state-message-icon-warning-color (orange)
The “clickOperation” should remain as is.
The “tooltipContent” is the descriptive text for the item when the user hovers over it.
The Reviewer Comment Types configurations defines up to 4 custom
comment types that are available for each Comments, Global (Publication)
Comments, and Proposal Comments. The configuration file is called reviewerCommentTypes.json is located in the uiconfigs folder.
{
	"CommentTypes" : [
		{
			"value": "technical",
			"label": "Technical Comment",
			"tooltip": "Only show technical comments."
		},{
			"value": "general",
			"label": "General Comment",
			"tooltip": "Only show general comments."
		},{
			"value": "editorial",
			"label": "Editorial Comment",
			"tooltip": "Only show editorial comments."
		},{
			"value": "",
			"label": "",
			"tooltip": ""
		}
	],

	"PublicationCommentTypes" : [
		{
			"value": "technical",
			"label": "Technical Comment",
			"tooltip": "Only show technical comments."
		},{
			"value": "general",
			"label": "General Comment",
			"tooltip": "Only show general comments."
		},{
			"value": "editorial",
			"label": "Editorial Comment",
			"tooltip": "Only show editorial comments."
		},{
			"value": "",
			"label": "",
			"tooltip": ""
		}
	],

	"Proposal" : {
		"MotivationHelpText" : "Motivate your proposal",

		"ProposalCommentTypes" : [
			{
				"value": "",
				"label": "",
				"tooltip": ""
			},{
				"value": "",
				"label": "",
				"tooltip": ""
			},{
				"value": "",
				"label": "",
				"tooltip": ""
			},{
				"value": "",
				"label": "",
				"tooltip": ""
			}
		]
	}

}
The “value” is stored in the database and is typically lower case.
The “label” is displayed on the comment screens.
The “tooltip’ is displayed on the filter screen.
C:\Titania
\WebEditor.nlog.config file can be updated
to set the log level to one of four possible values:
Trace
Debug
Info
Error
The following steps describe how to set the logging level:
nlog.config file within the application and open it in a text editor.
logs folder.
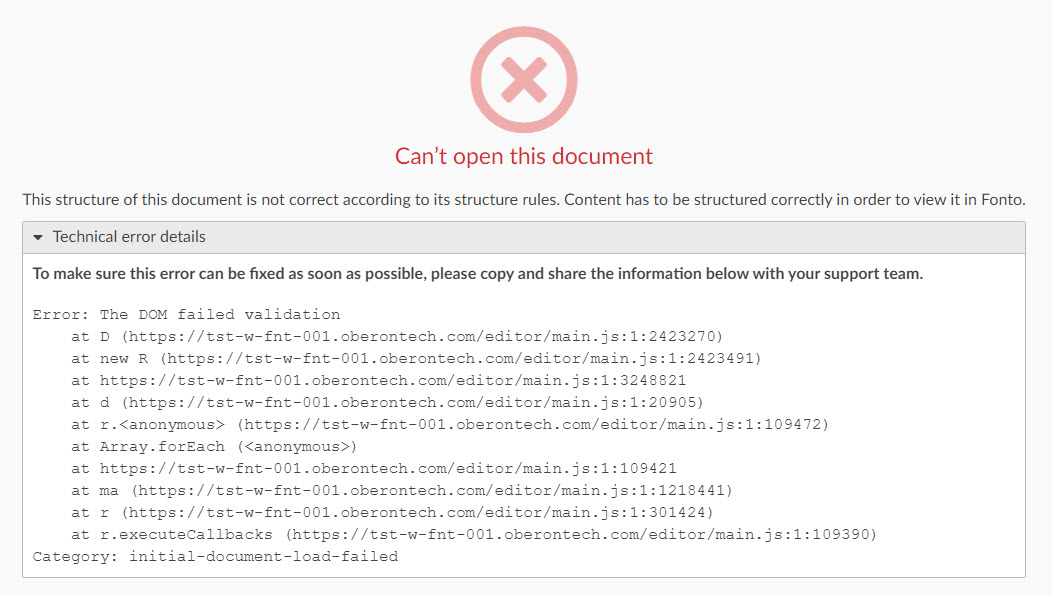
If a DOM error appears in Titania Web Editor , the first step to try is running a Completeness Check. Follow the steps below to run a Completeness Check.
The system is initiated using a unique URL describing the application. There are several conditions to keep in mind:
If the document number is passed on the URL, the application opens the specified document without having the user browse to the document.
If the document number is not passed on the URL, the Open Document browser is displayed.
Additionally, Arbortext Editor provides an option for users to generate a Titania Web Editor and/or Titania Web Reviewer URL for an opened document, as well as a link to open the document in either application.
Examples of URLs:
Titania Web Editor
URL for
Browsing: https://<servername>/webeditor
Titania Web Editor
URL for
Direct Document Editing: https://<servername>/webeditor?docNbr=0000000046
In this example, 0000000046
is the Windchill object
number of the document to be edited.
Titania Web Reviewer
for Direct
Document Reviewing: https://<servername>/webreviewer?docNbr=0000000046
Note: If a Titania Web Reviewer
URL is entered without a direct document number, the following
message is displayed:
Titania Web Reviewer
requires that the Windchill document number be passed on the
URL. Please make sure the URL that you are using is correct.
To enable users to participate in a the review process, it may be necessary to have a workflow generate a Web Reviewer URL that is then sent to the reviewer. This workflow would typically be initiated on a state change defined in an OIR. While every workflow changes based on specific use cases, the following will detail how to configure the Expression Robot within an overall workflow.
Deploy titania.properties as described
in the “Windchill Context Menus” section. It is not necessary to also
deploy the context menus.
Modifytitania.properties by coping and
pasting the WebReviewURL property to a new WebReviewBaseURL property. Remove the “?docNbr=” from the WebReviewBaseURL property
Create a Workflow variable called workflowVariable as a java.lang.String. The resulting link will be
set into this variable.
Within a Workflow template, add an Execute Expresssion task. Set the name to “Generate Web Reviewer URL” or something meaningful.
In the Expression tab, copy the below code and past into the Expression dialog. Verify all is good by clicking the Check Syntax button.
When this workflow is executed, the resulting URL will be set into
the workflowVariable , which can then be used in
a downstream task such as sending emails.
Simple vs Rules-based URL
There are two options for generating a URL. One URL simply passes
the URL with the document number of the document to be reviewed. This
enables reviewers to review the document at any time without any constraints.
With rules-based review, the reviewer can only review the document
within the rules defined within the workflow. To switch from simple
to rules-based, simply set the useRules variable
to true.
Currently, reviewExpDate is the only available
constraint which prevents reviewers from submitting comments once
past the date specified in the reviewExpDate. The
date is based on the reviewers local date.
Constructing a Rules-Based Web Reviewer URL
The encoded expiration date is passed with the document number
in the Web Reviewer URL in the rules parameter. The value of rules is the document number and expiration date encoded as Base64.
For instance, {'docNbr':'0000120367','reviewExpDate':'20230628'} is encoded and appears in the Web Reviewer URL as https://localhost/webreviewer?rules=eydkb2NOYnInOicwMDAwMTIwMzY3JywncmV2aWV3RXhwRGF0ZSc6JzIwMjMwNjI4J30= . The URL can be generated using the Arbortext Editor Share option.
Refer to Section 4.2 for install instructions for the Arbortext Editor
Web Collaboration application.
Programmatically Generating a Web Reviewer URL
The same code can be used to generate a Web Editor URL. However,
the Web Editor currently only supports a simple URL. Rules-based URLs
are not supported. To generate a Web Editor URL, follow the same steps
as above using the WebEditorURL property. Make sure
to update the code appropriately.
// Using rules allows additional control of how the users can interact with Web Reviewer.
boolean useRules = false;

wt.epm.EPMDocument doc = (wt.epm.EPMDocument)primaryBusinessObject;
String docNbr = doc.getNumber();

java.util.ResourceBundle resource = java.util.ResourceBundle.getBundle("titania");

String twrlink = "";
if (useRules) {
	// Get date 10 days from today.  The review period will end at the end of this day based on the users local time.
	java.time.LocalDate today = java.time.LocalDate.now();
	java.time.LocalDate dueDate = today.plusDays(10);

	// Format the dueDate to YYYYMMDD
	java.time.format.DateTimeFormatter formatter = java.time.format.DateTimeFormatter.ofPattern("yyyyMMdd");
	String reviewExpDate = dueDate.format(formatter);

	// Format json
	String jsonString = String.format("{'docNbr':'%s','reviewExpDate':'%s'}", docNbr, reviewExpDate);
	//System.out.println(jsonString);

	// Encode the json to base64
	String base64String = java.util.Base64.getEncoder().encodeToString(jsonString.getBytes());
	//System.out.println(base64String);

	// Grab the WebReviewBaseURL from the titnaia.properties file
	String baseAPIURL = resource.getString("WebReviewBaseURL");

	// Create the link with the encoded rules
	twrlink = baseAPIURL + "?rules=" + base64String;
} else {
	// Grab the WebReviewURL from the titnaia.properties file
	String baseAPIURL = resource.getString("WebReviewURL");

	// Create the link and set the docNbr directly in the URL
	twrlink = baseAPIURL + docNbr;
}

//System.out.println("twrlink=" + twrlink);

// Set the link into a workflow variable to included in a downstream wf task
workflowVariable = twrlink;
Was this helpful?