Creating Your First Portal
A Portal is a content delivery
channel. Think of a Portal like its own website targeted at an
individual audience. A Portal can pull its content from one or more
Projects and filter that content using metadata rules.
- Navigate to the Portals category within an organization.
- Create a new Portal by clicking a New... button in the header of one of the sections in your Portals list.
- Fill out the Create New Portal dialog.
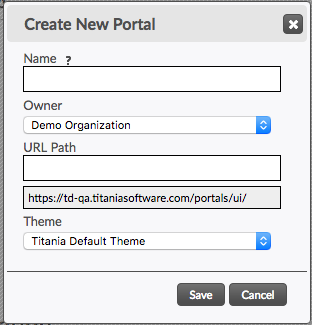
- Name
- The Name is the "Administrative Name", visible only in the Admin Application. This name will not appear anywhere in a Portal.
- Owner
- Select an Owner from the dropdown.
- URL Path
- Enter a URL path for the address of your portal. This will be the URL path on the
portal website used to access this portal. This prefix must be at least 2 characters
long and cannot contain spaces. For example, "myportal".
Note: This is the URL address of the portal. Thus no two portals can share the same URL path. You will be warned if the path is already taken.
- Theme
- This dropdown allows you to switch between any portal themes that are available to you.
- Click Save.
- Click on the newly created Portal name to open its details.
- Click the Projects tab to associate projects with this
portal.

- Click the Add link next to one of the projects in the Other Candidates list to add projects to the portal.
- Click the Details button. Click the URL at the top of the page to open the portal in a new browser tab or window.
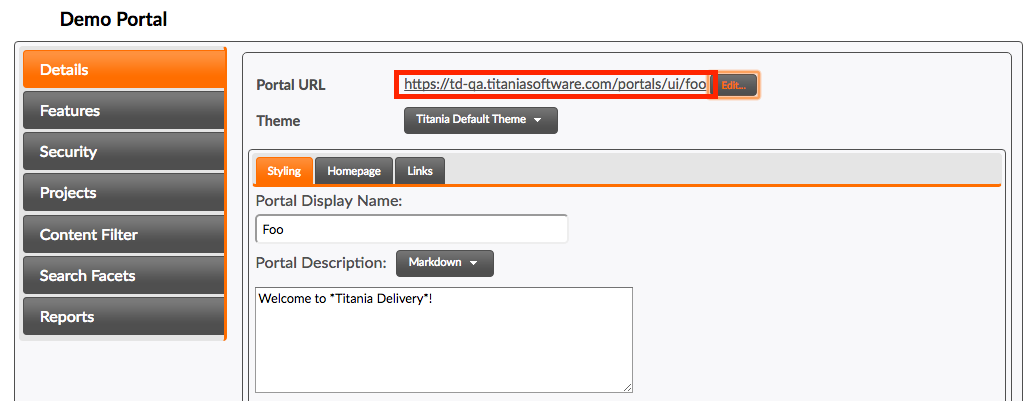
When you associate a project with a portal, by default all content of that project becomes available through that portal. However, you can filter the content for the portal by assigning Metadata filters via the Content Filter tab.